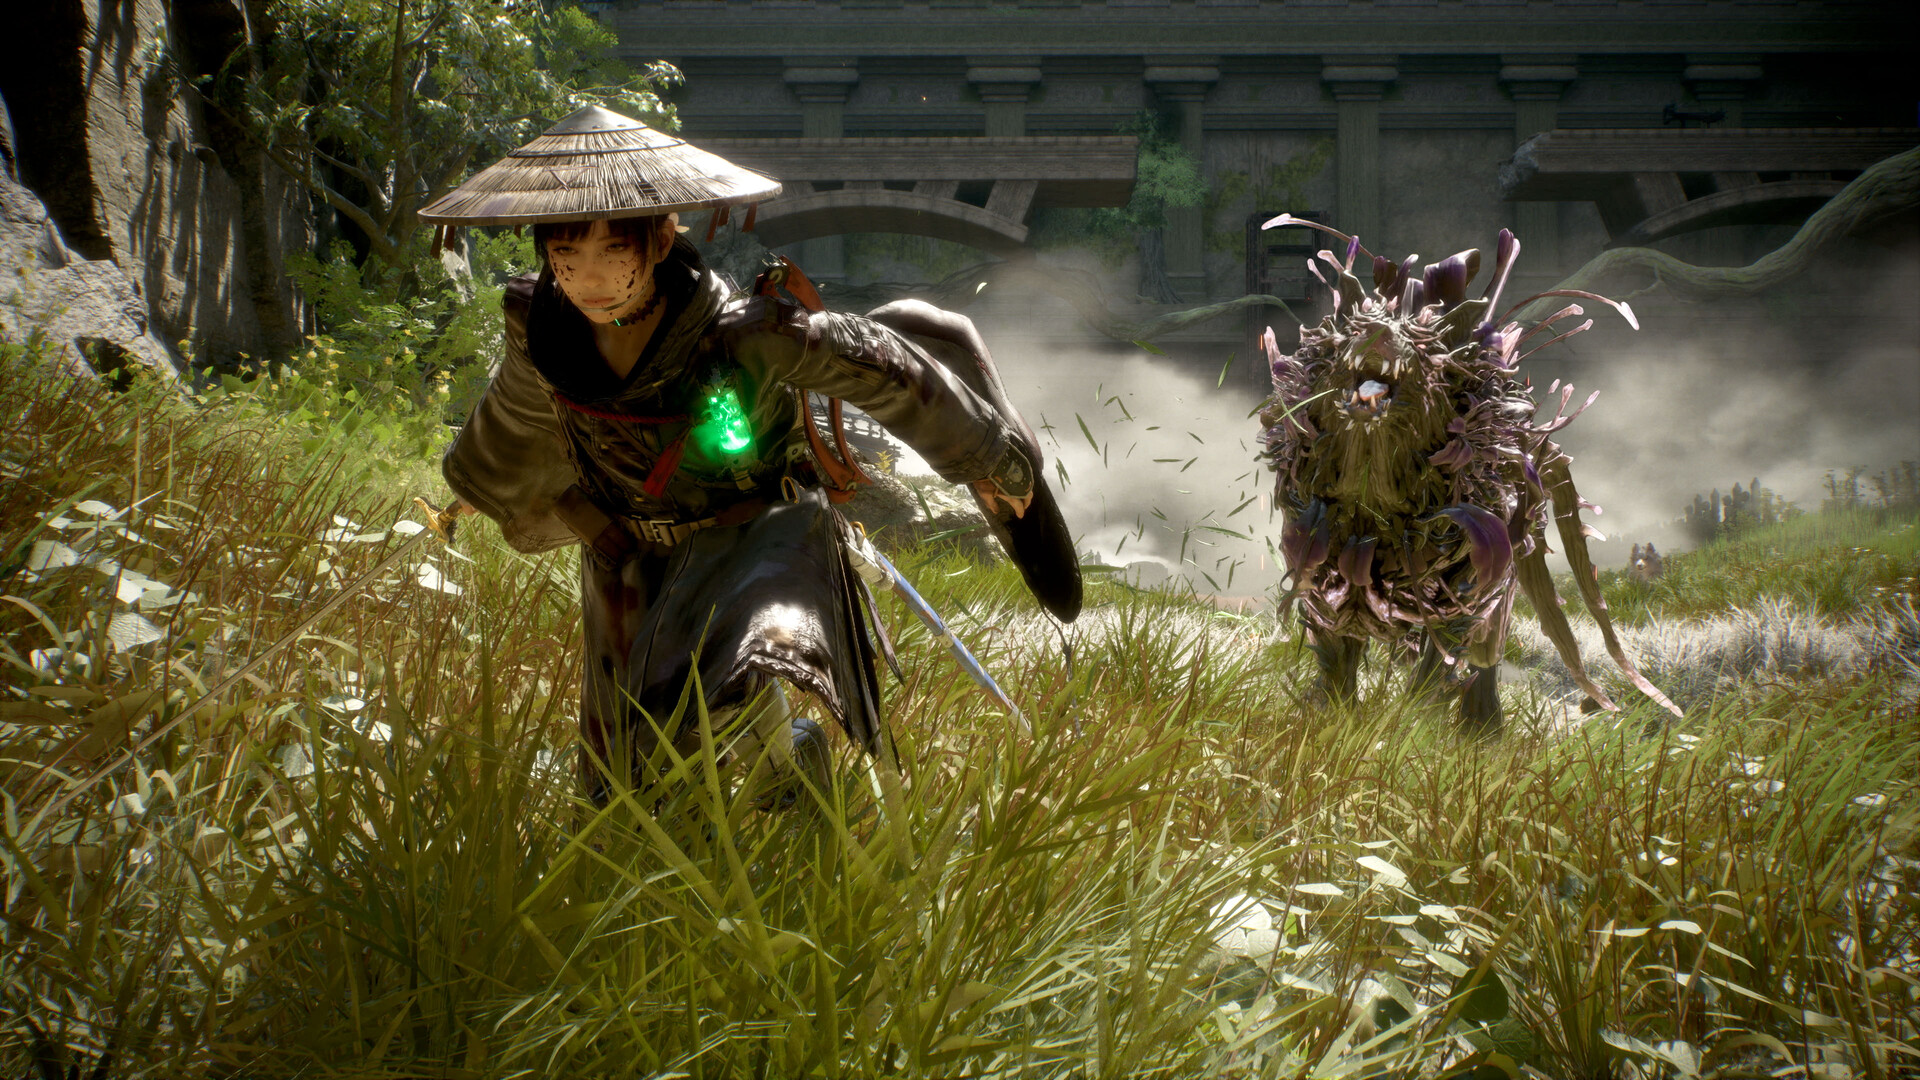
How boss fights work
Beast of Reincarnation is a single-player action RPG from Game Freak — their first AAA action RPG outside Pokémon — built in Unreal Engine 5 and set in a post-apocalyptic Japan of the year 4026. You play Emma, a Sealer who is herself afflicted by the Blight, travelling with her withered wolf companion Koo. Each region is a hand-built area anchored by a Blighted Forest, a corrupted dungeon spawned by the giant Malefact that rules it. Those apex Malefacts — the region rulers, also referred to as Nushi — are the story bosses, and sealing each one is the spine of the whole game.
- Bosses are colossal Malefacts. Creatures fully consumed by the Blight, staged as set-piece encounters that tower over Emma and Koo at the heart of each Blighted Forest.
- Sealing a boss grants its power. A Sealer's job is to absorb the Blight into her own body: beating each apex Malefact lets Emma and Koo take in its power and unlock a new Nushi Skill that feeds straight into your build. Boss order and boss rewards are the progression system.
- Fights are parry-centric. Emma's swordplay runs on Sekiro-style deflection — a perfect block beats a dodge, and every well-timed parry banks Florescence Points (FP), the resource Koo spends on his Bloom Arts (see the Koo command guide).
- Break the Down Gauge to open a boss up. Landing hits and clean parries fills a boss's Down Gauge; break it and the boss is stunned wide open for heavy punishment — the same meter that lets you execute lesser Malefacts outright.
- The command menu is your breathing room. Opening Koo's Bloom Arts menu slows the action — it does not pause, so Emma still has to move and block in real time — letting you read a boss's pattern and pick the right counter. Game Informer compared the slowdown to Final Fantasy VII Remake's command menu.
The boss combat loop: parry, bank, spend
Every fight against a large enemy comes back to the same core rhythm, and it inverts the usual Soulslike instinct of dodging away and poking:
- Parry to earn. Deflecting a boss's strikes replenishes FP. Defense is literally your damage engine — a passive, dodge-only style starves Koo of resources.
- Bank until an opening. FP carries between exchanges, so you can weather an aggressive phase, then cash in when the boss commits to a long recovery animation.
- Spend on Bloom Arts. Koo converts banked FP into burst damage, crowd control, or Down Gauge pressure — and when Emma's own Entanglement Gauge fills its seven segments she can trigger Entanglement Overdrive, a slow-time burst window that is one of the safest ways to open a stubborn boss.
Emma and Koo each grow along their own skill trees (spent with SP), and your three attributes — Strength (attack and defence), Vitality (HP) and Florescence (HP and skill power) — plus swappable Katana / Bow / Crossbow weapons and Spirit Stones socketed into armour decide whether a fight becomes a stand-your-ground duel or a hit-and-fade hunt. The four broad approaches — melee pressure, ranged elemental, stealth execution, and Koo's Bloom-Art parry play — are all viable; the builds guide breaks them down.
Full boss list — weaknesses, chapters & rewards
Eleven unique story bosses gate the campaign; several are refought at higher levels in later chapters, and two are dual fights. The chapter, level and weakness data below is from Game8's tested launch coverage, and the order matches the in-game achievement list. An early version of this page listed a speculative pre-launch order (including a “Koo's Nushi form” fight that is not in the shipped game) — that has been corrected.
| Boss | Weakness | Appearances (chapter · level) | Unlocks |
|---|---|---|---|
| Rangifer | Flame | Ch.1 (Lv.9), Ch.1 (Lv.12), Ch.5 (Lv.32) | Nushi Skill: Sakura Storm; Sakura: Javelin (→ II), Blade Art & Finisher: Sakura |
| Nue Malefact | Poison | Ch.1 (Lv.16), Ch.3 (Lv.20), Ch.6 (Lv.32) | Nushi Skill: Chimeric Flow (with the Ch.3 fight) |
| Lacerta | Lightning | Ch.2 (Lv.13), Ch.2 (Lv.16) | Nushi Skill: Dokuzeri Shower; Dokuzeri: Fang, Blade Art: Dokuzeri |
| Shidou & Nue (dual) | Poison | Ch.3 (Lv.20), Ch.6 (Lv.35), Ch.11 (Lv.48) | Nushi Skill: Chimeric Flow; Erica: Strangle, Blade Art: Nue |
| Taurus | Acid | Ch.4 (Lv.26), Ch.4 (Lv.29), Ch.8 (Lv.44) | Nushi Skill: Charging Botan; Botan: Chaser (→ II), Blade Art & Finisher: Botan |
| Corvus | Lightning | Ch.7 (Lv.38) | Nushi Skill: Acid Burst Nobudou; Nobudou: Burst, Blade Art: Nobudou |
| Kunai & Kirin (dual) | Poison | Ch.8 (Lv.45), Ch.12 (Lv.49) | Blade Art: Thunder, Numasugi: Skewer (Ch.12 fight) |
| Crimson Malefact | Water | Ch.9 (Lv.45) | None — a pure story wall, fought solo without Koo |
| Ursa | Acid | Ch.10 (Lv.46) | Asagao: Boa II, Finisher: Asagao |
| Erymanth | Explosive | Ch.12 (Lv.47) | Kiku: Bloom Strike II, Finisher: Kiku |
| Beast of Reincarnation | None | Ch.13 (final) | Blossoms of Reincarnation |
One optional early oddity: the Door Golem in Chapter 1 (weak to Bind and Acid) drops Scrap Metal and is the game's first taste of a gimmick fight.
How far do players actually get?
Steam's global achievement statistics double as a live difficulty curve (percentages read August 31, 2026 — they move slowly over time):
| Milestone | Global unlock rate |
|---|---|
| Rangifer sealed (“Rangifer's End”) | 53.4% |
| Lacerta sealed | 43.7% |
| Taurus sealed | 34.6% |
| Corvus sealed | 28.2% |
| Ursa sealed | 24.8% |
| Shidou & Nue resolved | 24.6% |
| Erymanth sealed | 24.4% |
| Kunai & Kirin sealed | 24.3% |
| Final boss beaten (“The End of Reincarnation”) | 24.0% |
Read the shape, not just the numbers: almost half of all players never seal the first boss, and the steepest drop is the early game — from Corvus onward nearly everyone who is still playing finishes. If Rangifer is stopping you, that is the game's intended skill check, not a sign the rest will be worse.
Note on names: the giant story bosses are most often called Malefacts in official material; "Nushi" is used for the region-ruling apex bosses and for the Nushi Skills you unlock by sealing them. We use both here where the sources do.
Boss strategies
These notes stick to what the data supports — each boss's confirmed weakness, when you meet it, and how the parry/FP loop applies — rather than invented move lists. For frame-by-frame patterns, the video guides linked from each fight's community pages are the better tool.
Rangifer — the first skill check (Ch.1, weak to Flame)
- You meet it at Lv.9 and again at Lv.12, with a Ch.5 rematch at Lv.32. It is the game's exam on parry timing — and the global data (53.4% completion) says nearly half of all players stop here.
- Exploit Flame. Slot Fire onto arrows/bolts or your katana; ignite damage is your fastest route through its health bar.
- Parry the antler sweeps to bank FP, then spend on Koo's Bloom Arts during recovery windows. Sealing it grants Sakura Storm, your first Nushi Skill.
Lacerta (Ch.2, weak to Lightning)
- Fought twice back-to-back at Lv.13 and Lv.16. Its second phase turns poisonous — bring antidotes.
- Lightning, not Fire, is the opening here. Shock staggers feed the Down Gauge; bind-and-punish with Koo works well against its lunges.
- Reward: Dokuzeri Shower plus the Dokuzeri Blade Art — the poison tools you will want for the next stretch.
Shidou & Nue — the recurring dual fight (Ch.3 / Ch.6 / Ch.11, weak to Poison)
- The pair alternates — keep your parry rhythm on whichever is active, and spend banked FP in the hand-off gaps.
- You face them three times, at Lv.20, Lv.35 and Lv.48; the Ch.3 fight grants Chimeric Flow, and the final Ch.11 resolution unlocks Erica: Strangle and the Nue Blade Art.
- Poison is their shared weakness — the Dokuzeri kit from Lacerta is built for exactly this.
Taurus (Ch.4, weak to Acid)
- Two Chapter 4 encounters (Lv.26, Lv.29) and a Ch.8 rematch at Lv.44. A charger — parry the committed rushes rather than chasing it.
- Acid arrows/bolts strip it fastest; sealing it grants Charging Botan and the Botan line of arts.
Corvus (Ch.7, weak to Lightning)
- A single encounter at Lv.38. Shock damage both exploits its weakness and feeds stagger pressure.
- The reward is the game's most build-defining pickup in the back half: Acid Burst Nobudou plus the Nobudou Blade Art — the Acid kit that Ursa (also weak to Acid) is waiting for two chapters later.
Kunai & Kirin (Ch.8 & Ch.12, weak to Poison)
- The second dual boss: Lv.45 first meeting, Lv.49 resolution. Same discipline as Shidou & Nue — fight the active one, bank through the swaps.
- The Ch.12 fight unlocks Blade Art: Thunder and Numasugi: Skewer.
Crimson Malefact — the solo wall (Ch.9, weak to Water)
- Emma fights this one alone — no Koo, no Bloom Arts, no FP economy. It is a pure test of her own parries, elemental weapons and Entanglement Overdrive.
- It is weak to Water, and it grants nothing when it falls — this fight exists to prove you can stand without the dog.
- Come self-sufficient: your own healing, your own status cures.
Ursa (Ch.10, weak to Acid) and Erymanth (Ch.12, weak to Explosive)
- Late-game single encounters at Lv.46 and Lv.47. By now the game assumes you are using elemental counters deliberately: Corvus's Acid kit into Ursa, Explosive ammunition into Erymanth.
- They round out your arts: Asagao: Boa II / Finisher: Asagao and Kiku: Bloom Strike II / Finisher: Kiku respectively.
Beast of Reincarnation — the final boss (Ch.13, no weakness)
- No elemental weakness — the finale tests the fundamentals instead: clean deflection, Down-Gauge pressure, and disciplined FP spending.
- Bring your most practiced loadout, not your most exotic one. Beating it rolls the story into its single ending and unlocks New Game Plus (see the endings guide).
- 24.0% of Steam players have finished it — if you are here, the hard part was the first two chapters.
Boss strategy fundamentals
1. Parry first, dodge second
Deflection is the core defensive verb, and parries feed Koo's FP. Against these giant Malefacts, expect parryable weapon swings mixed with unblockable slams that force repositioning. Learning to tell them apart — reading a boss's cadence — is the skill the whole game is built around.
2. Spend Koo's Bloom Arts on openings, not panic
Koo's command menu slows time, but his abilities run on the FP you earn by parrying. Survive the pressure, bank points, then convert them into burst damage or Down-Gauge pressure during the boss's recovery windows. Burning FP defensively in a panic leaves you with nothing when the real opening arrives.
3. Build for the fight in front of you
With four viable approaches — melee pressure, ranged elemental, stealth execution and Koo's parry play — plus three attributes (Strength, Vitality, Florescence), swappable weapons and Spirit Stones, keep an alternate setup ready before each Blighted Forest. You can respec, and every sealed boss's Nushi Skill widens your options as the campaign goes on. Match your elements to the enemy, as with Fire on Rangifer.
4. Difficulty is adjustable — use it
Unlike most Soulslikes, Beast of Reincarnation ships with selectable difficulty, including a Story Mode for players who want the world and narrative without the hardest challenge curve; the director has said plainly that he doesn't want players to get stuck. If a wall stops your run, lowering the difficulty for one boss is a tool the developers deliberately built in — not a failure state. See the difficulty guide.
Boss FAQ
How many bosses are in Beast of Reincarnation?
There are eleven unique story bosses: Rangifer, the Nue Malefact, Lacerta, Shidou & Nue, Taurus, Corvus, Kunai & Kirin, the Crimson Malefact, Ursa, Erymanth, and the final Beast of Reincarnation. Two are dual fights, several recur at higher levels in later chapters, and smaller mini-boss Malefacts (like Chapter 1's Door Golem) fill the Blighted Forests between them.
What order do you fight the bosses in?
By first encounter: Rangifer and the Nue Malefact (Ch.1) → Lacerta (Ch.2) → Shidou & Nue (Ch.3) → Taurus (Ch.4) → Corvus (Ch.7) → Kunai & Kirin (Ch.8) → Crimson Malefact (Ch.9) → Ursa (Ch.10) → Erymanth (Ch.12) → Beast of Reincarnation (Ch.13). Rangifer, the Nue Malefact, Shidou & Nue and Taurus all recur at higher levels in later chapters.
What do you get for beating a boss?
Sealing an apex Malefact lets Emma and Koo absorb its power and unlock a new Nushi Skill that plugs into your progression alongside the skill trees, weapons, and Spirit Stones. Later encounters with the same boss upgrade those arts (Sakura: Javelin II, Botan: Chaser II) or add Finishers. Boss rewards are core character growth, not optional trophies.
Which boss do you fight without Koo?
The Crimson Malefact in Chapter 9 (Lv.45, weak to Water) is a solo fight — Koo isn't with you, so you can't use FP or Bloom Arts. It's a pure test of Emma's parrying, elemental weapons, and Entanglement Overdrive.
Is there more than one ending after the final boss?
There is a single main-story ending plus New Game Plus. Reaching Chapter 13 and defeating the Beast of Reincarnation triggers the ending and unlocks NG+; there is no confirmed branching or multiple-ending system. The full breakdown is on the endings guide.
Can you change the difficulty mid-game for a hard boss?
Difficulty options including Story Mode are in the game, and the design intent is explicit: bosses are meant to be beatable by non-experts without abandoning the run. See the difficulty guide for the details.
Related guides
- Koo commands & Bloom Arts explained
- Best builds: skill trees, weapons & spirit stones
- All weapons: Katana, Bow & Crossbow
- Difficulty options & Story Mode explained
- Beginner guide — first hours done right
- Ending & New Game Plus explained
Sources
- Beast of Reincarnation — official Steam store page
- Xbox Wire — "Beast of Reincarnation: A One-Person, One-Dog Action RPG" (Developer Direct)
- Game Informer — Beast of Reincarnation hands-on preview (July 2026)
- GameSpot — Beast of Reincarnation release date and everything we know
- Game8 — List of All Bosses — weaknesses, chapter appearances, levels and skill rewards (updated August 8, 2026)
- Steam — global achievement statistics — completion percentages (read August 31, 2026)
Last reviewed: August 31, 2026 · Game version checked: 1.0.9 · Moving figures state the date they were read